Showing posts with label tutorial. Show all posts

Wednesday, March 13, 2013

DIY Pillow Pet

Who doesn't want to take their pet with them everywhere?  This is a great way to bring your favorite animal in plush form to work or maybe vacation where our little friends are not always welcome...or it can just stay at home too as part of your home decor.  Plus, it's just a great way to put their cute mug on a pillow.  It may be verging on crazy, but I think it's just perfect for anyone who loves their pet(s).  I know I'm not the only one.
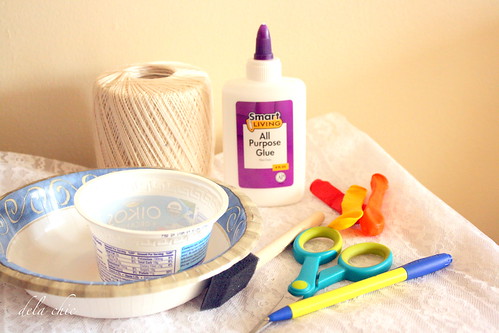
pillowpet92 
Materials:
pet photo
iron on transfer paper
computer program and ink-jet printer
fabric: solid colored cottons or jerseys work well
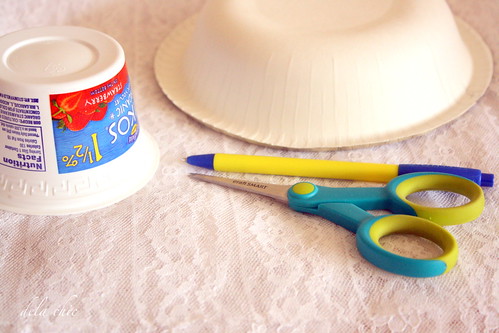
scissors
needle & thread/sewing machine
polyfil

pillowpet1
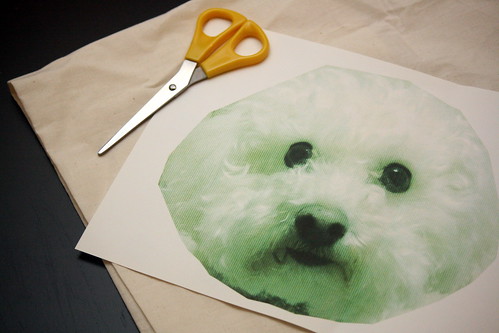
I chose the best photo to use for my pillow and cropped it with a computer photo program.  Some may have options for printing on special paper like the photo transfer paper, if not I am sure you can just make sure that the photo fits when printed.  

pillowpet2 
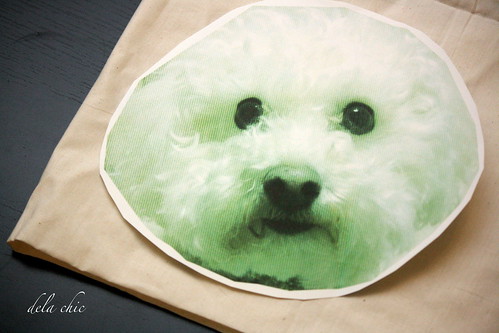
Cut printed photo paper around the actual cropped photo.  You can certainly cut closer to the
photo if you choose.  It's definitely your preference.

pillowpet3 
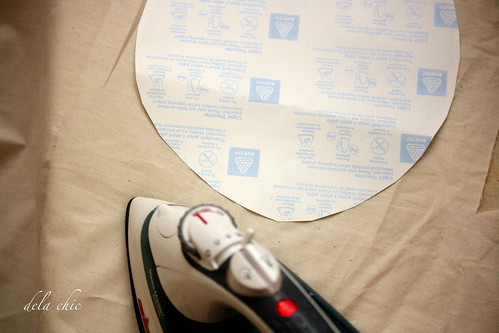
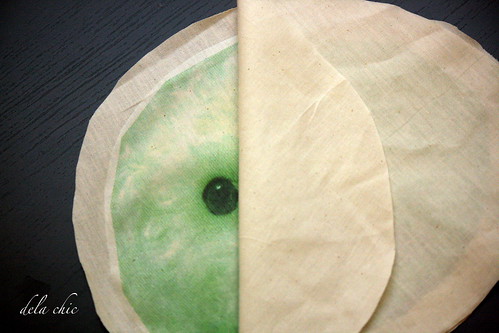
Iron on the photo paper picture side down.  Make sure to read the directions for proper application!

pillowpet4 
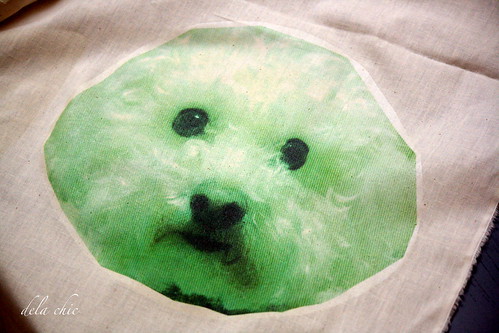
After several minutes peel the back of the paper, and the photo is transferred onto the fabric.

pillowpet5 
Cut one inch around the photo.  Make sure to cut two pieces: front and back.

pillowpet6 
Time to sew.  You can just sew by hand or use a sewing machine which will certainly be
more sturdier.  The picture should be "sandwiched" in the middle before sewing both pieces together.

pillowpet7 
Make sure to leave an opening.  

pillowpet8 
Turn the pillow right side out, using the opening that was left unsewn then fill with polyfil to 
desired puffiness.

pillowpet9 
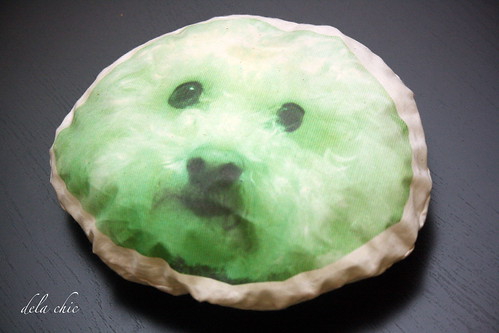
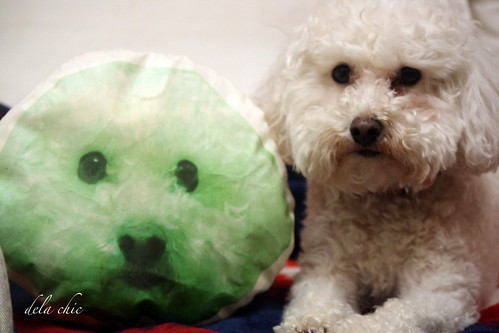
Darling's face is now on a pillow!

pillowpet91
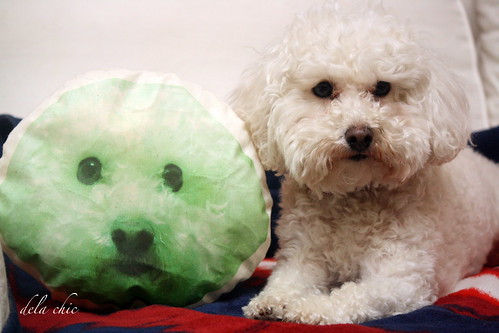
Here's Darling posing with her pillow.
As you can see the pillow version of Darling has a green tint to it.  It may be due to the ink in the printer.
Note to self: change photo to grayscale next time.
The pillow will be traveling on holiday with my aunt, and Darling will be staying with us.

I may end up making a pillow of each of the dogs in my family; some standing, sitting, sleeping....so many ideas.  

Tuesday, February 19, 2013

It's Good On Paper

hermes8
Just because I can't afford an Hermes bag, doesn't mean I can't make one out of paper.  Go over to Hermes and make yourself a Heremes Jige Clasp yourself.  There's several designs to choose from, but since I couldn't stop with just one, I made four of them.  They're not that functional, well maybe a little handy container for receipts and coupons, but still cute.  

 hermes1 hermes2 hermes3 hermes01 hermescollage

Friday, February 15, 2013

Lace Balloon DIY

laceball94
I've seen the doily ball tutorial on Pinterest.  I went searching for crocheted doilies at thrift stores and craft stores, but honestly I didn't want to spend more than a dollar for a doily since I needed a few to cover a balloon.  As much as I love to crochet, I wasn't sure if I wanted to crochet my own doilies since I was pressed for time. The best wallet and time friendly way to make something similar was to use lace instead.  Luckily I just happen to have lace already as well as other general supplies needed for this project.

laceball1
Materials: lace fabric, bowls for template/glue container, balloons, foam brush, pen, string, glue

laceball2
Draw and cut circles from the lace fabric with the template.

laceball3
Cut several sizes for variety.  You can certainly have one size circles if you want.

laceball4
Blow up the balloon and make a knot at the opening.

laceball5
Tie a string.

laceball6
Slather on glue on the balloon first then apply the lace.  Add more glue on the lace.

laceball7
Overlap the edges of the lace circles.  Make sure that there aren't any huge gaps.  Continue until
the whole balloon is covered except for the area where the knot is.

laceball8
Slather on more glue after the whole balloon is covered with lace just to ensure that the
lace ball will be stiff once it is dry.  Then tie the balloon somewhere and let dry for at
least 24 hours.

laceball9
After you've waited at least a day, it is time to pop the balloon.  Take out the deflated balloon
from the top hole that you left.

laceball92
Poke holes if needed and attach string, then hang the dainty lace ball.

Wouldn't this be so pretty for a vintage inspired party or maybe for Easter?
Another variation would be tea staining the lace before using it in this project to give it a vintage/old feel to it.
Happy Friday folks and hope you have a great weekend!

Tuesday, June 12, 2012

Covered Clementine Crate Tutorial

Do you love to buy clementines at the store and don't know what to do with those crates?  Hope this post will give you the push to recycle those wooden boxes that can be used for so many things.   For this project, I've made a centerpiece or decoration out of the crate with paper flowers and a watering can with "water" sprinkled on the small garden.  Perfect for a bridal or baby shower, or just brighten up an office or a corner in a home.

You will need:
clementine crate 
burlap or any fabric you want (1/2 yard will yield for 2 crates)
scissors
hot glue gun w/glue sticks
stapler w/staples

Labeled parts of the clementine box.
Place the clementine box in the middle of the burlap.  Make sure that
all of the sides are even and that there's enough fabric to go over the panels
Cut from the corner of the burlap up to half an inch before you
get to the clementine box.  I did this for one of the short sides first
Apply hot glue between the posts.  Don't go past the posts!
Pull the burlap up making sure that it is stuck on the box.
Be careful that you don't burn your hand.
Turn the box around, working on the inside.  Cut the burlap right along
side of the posts for each side
Still working on the inside of the box,
Add hot glue to the panel and fold down the flap between the posts.
Now, do the other short end of the box.
The end result would look like this for both short ends.
Time to work on the short end corners.
Tuck the extra flap inside.
Make sure to line it with the edge of the panel, the posts showing.
Add hot glue on the panel
Fold the corner triangle of burlap over around the corner.
Make it go around the post.  It should end behind the post.
Now, do the same for the three other corners.
Now time to work on the longer sides of the crate.
Fold one corner along side of the box.
Now, do the same for the other side.  You will have an isosceles trapezoid
on the side of your box (oh man I went mathematical on you).
Put the box on it's side which will make it easier to fold down the fabric.
Add glue on the panel, and fold down the fabric making sure that the
fabric stays on the wood (watch out for the hot glue).
Put the box right side up again.  To make the folds look neat, staple on the folds.
Repeat Do this for the other side of the box. 
Et voila!! The covered clementine box.
Related Posts Plugin for WordPress, Blogger...